Thursday, February 18, 2010

Embed Crazy!

After a trip to a gem show in Tuscon, my father-in-law brought back the idea of selling gems with soaps, either embedded or as lathering agents...so, in order to make it fit into our budget I took a trip to the craft store and couldn't wait to start soaping!

I started by embedding other soaps, with great direction from Anne Marie - just find any shape cookie cutter or soap mold and your on your way to embedding . One important this to remember when embedding soaps, is to use non-bleeding micas (I, of course, prefer BrambleBerry micas). Below are a few of my favorite examples of soaps embedded in soaps.

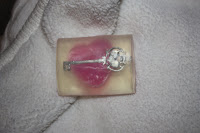
Finally, I started embedding objects into the soap. In order to do this, it's necessary to pour one layer of soap and let it set up. Spray with alcohol, embed the object and pour the final layer of soap. Below are a few of my favorite examples of objects embedded in soaps. Enjoy!


Tuesday, February 16, 2010

Finding Success in a Failure

Sometimes I'll dream up a beautiful idea for a soap and work for hours trying to make it absolutely perfect. Usually, the dream turns out to be a reality... or it comes out pretty close to what I was hoping for. Other times, something goes wrong and what I was hoping to be a beautiful bar of soap comes out with some sort of deformity or other problem/error/mistake. It's easy to get bummed out when this happens but I've learned to make my mistakes into new works of art!

Take this bar of soap as an example. I was so proud of myself for all the beautiful layers I had created and it smelled SO good. I was sure it was going to be one of my favorites (and had it turned out the way I wanted it probably would have made that favorites list). But something happened along the way and one layer just would NOT stick to the other layers and fell out of every bar I cut from the loaf (except this bar here -- which was an end piece)! How annoying!

The colors were all so beautiful that I decided to make a new bar of soap that would be able to show off some of the gorgeous hues. I took out the problem layer (in this case, it was the white layer) and melted it down. Next I took the purple and pink layers and chopped them up into little cubes. I combined the cubes into the melted white layer to create this fun bar of soap that reminds me of a geode!

Isn't it amazing how you can take something that didn't turn out the way you wanted and create a whole new fun idea!? Failure schmailure!!

Thursday, February 11, 2010

Orange You Happy?

What do you get when you mix a trip to the plumbing section of Menard's, three PVC pipes, a multi-tool(thank you Jerry!) and soap? 

Orange slices of course!

Citrus soaps turned out to be a bit more challenging than initially thought but definitely worth the wait and work!  There are quite a few steps to creating an orange looking soap.  I found the trick to getting the whole project to come together was the length of the PVC pipes - the first and smallest pipe was about 6 - 8" long.  Once that is poured and hard - remove it from the PVC pipe, slice it and and it's time to add your orange rind!  I found it to be easiest to use a PVC pipe that was shorter than the orange slices - it was easier to handle the 'slices' and arrange them. I then poured in the white soap base, let it harden and remove it from the PVC.  Finally - put the middle of the orange into the largest pipe and, of course, let it harden, remove from PVC and slice. 

These can be made to look like oranges, lemons, limes or any other type of citrus fruit you feel like making.  Check back for more soap ideas or just to read about Jen and Laura! 

P.S. If you have any tips on how to make citrus soaps even easier - please don't hesitate to add comments!

Laura

One Soap, Two Methods

A couple of weeks ago I made a lemon slice soap that I've seen around on the Internet and had a recipe for in one of my soap books. The method seemed to be pretty advanced compared to all the other soaps I'd been making. It involved three difference sized of PVC pipes into which different soaps were poured in different steps of the entire process. Looks for Laura's post detailing the steps to make these PVC fruits.

Here's what my lemons looked like when I used this method. They're not perfect but I think they're pretty cute in an abstract lemon kind of way. =)

Last weekend I came across a new method of making these cute little lemons and decided to give that a try. This method (from www.teachsoap.com) was a little more simple and was easier to control the look of the lemons because you make each slice individually as opposed to making a bunch in a big tube. Here's how it went:
1. Pour your lemon-scented base into a container like a 9 x 9 silicone baking pan or something similar. I used the plastic lid of an aluminum 9 x 9 pan. Pour just enough to only be about 1/4 inch thick. Let this harden and release from mold.
2. Get three different sized round cookie/biscuit cutters -- small, medium and large (relatively). With the largest cutter, cut as many round sections out of the soap as possible. I usually get 4 big circles out of a 9 x 9. From those 4 use the medium cutter to cut a circle out of the center of your big circles. Then, use the smallest cutter to cut a circle from the center of your medium circles. You want to hold on to the largest ring and the smallest circle. Everything else is scrap and can be set aside for later use.
3. Take the small circle and cut it into six pie pieces. To make the lemon slices look more realistic, cut just the tip of the center point of the pieces to account for the center of the lemon.
4. Now it's time to assemble. Place your wedges inside of the large "peel" ring with some space in between each. Then, pour white base all around the wedges inside the ring. Make sure this is on a very flat surface so the base doesn't leak out. You should actually inject (instead of pour) the white base with a syringe or food flavor injector. Be sure to rinse it out in hot water immediately or else the soap will set up inside the injector and render it useless.

After letting these soaps set up, you have a lovely lemon that looks like this one! Cool, huh? These ones definitely turned out more realistic than the others. I had a bit of trouble evenly injecting the white base, but I'm sure that will get easier with practice. Think of all the other fruits you can do like this! Everything from orange to apple to kiwi!

Can't wait to perfect these methods and have lots of great fruit slices to enjoy!

Monday, February 8, 2010

New Goodies!

I received a shipment from Bramble Berry today and I can hardly contain myself! I got 10 pounds of clear base, a mica sampler (used to color the soaps) and teeny tiny mica measuring spoons. Very fun!

I melted down some previously made soaps just to add mica to them and WOW! It's amazing the difference just a little bit of extra color and shimmer can make. Which color is your favorite? I'm really excited to see how the golds and iridescent greens turn out.

Mica is just a type of mineral that is ground very finely and polished like any other gem or mineral to make it pretty and then can also be coated with other minerals. To read more about mica click here. Here are some pictures of mica before it's been processed (bottom) and mica as I get it for use in my soaps(top)!

Once I get a good chance to play with all these colors I'll post some pictures of soaps with and without mica. I'm not sure how well it will show up on a computer screen, but we'll give it a shot!

Jen

Monday, February 1, 2010

Wrapped Candy Soaps


Yesterday I made these adorable candy soaps!! The pink ones are Pearberry scented and the teal ones are Island Coconut scented. They look great alone but look even better when you wrap them in some plastic wrap just like real candies and throw a bunch together.

Thanks to Soap Queen Anne-Marie for the idea and recipe!

It's amazing what you can make with soap if you just have a little patience. Waiting is definitely the toughest part about making soaps but it's all worth it in the end. Just look at these cute little candies--I mean-- soaps!

Jen

Welcome to AnnaKate Soaps: The Blog!

Welcome to our blog!

Jen and Laura, the creative master minds behind AnnaKate Soaps, will use this space as a place to share new soap recipes, tell stories, look for feedback, post photos, and anything else their little hearts desire.

To get the latest updates ASAP, sign up to follow our blog and receive e-mail updates when a new entry is posted. Also, visit our Web site at annakatesoaps.webs.com -- still under construction as of now.

Of course, please feel free to comment if you have any questions, concerns or suggestions. AND, don't forget to vote in the polls to the right!

Thanks!